Tuesday 16 December 2014

Free SSL Certificates For Your Websites

5 comments :

A SSL/https enabled website really important because SSL certificates protects your website from hackers, spams, scams, increase trustability and worthiness and security of your website. Self-Signed SSL will provide a security warning to web browser and a normal standard SSL from your hosting provider will cost you few hundreds dollar with some days as issuing time so here I am going to explain how to get free SSL for unlimited domains and issued instantly which will work same like a standard SSL certificates.

What is SSL Certificates

SSL Certificates are micro files that digitally make bond to a key to an organization’s details. When ssl is installed on a server, it creates the https connection and allows secure connections from a web server to a browser. SSL certificates are normally indicated by the green bar in website browser and starting with https:// instead of normal http:// . 

Why I need SSL Certificates

The first reason why SSL is needed is to keep personal information sent over Internet encrypted and protected so that only the destination server can decrypt and understand it. Any hacker in between you and the server can see your sensitive info such as credit card numbers, usernames and passwords if it is not encrypted with an SSL certificate but when this is used, the information becomes encrypted to everyone except for the server. That’s how SSL  protects us from hackers and other scams.

How to get free SSL certificates:

Currently Startssl and cloudflare are giving unlimited free standard SSL while other providers are offering only trials and am going to discuss them later.

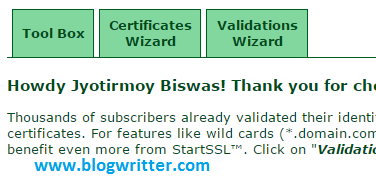
StartSSL Free SSL Certificates

StartSSL offers SSL certificares for 1 year so at first I will discuss how to get free SSL for 1 year and later I will discuss how to renew the ssl for free.

Sign up with StartSSL

First of all, sign up with startssl. This is not ordinary signup; in this sign up they will provide you a digital certificate which you have to save in your browser so I suggest you choose Google chrome and a PC.

After clicking continue, the page will forwarded to email address verification.

 Sometime while sign up you may see over capacity problem just because they are receiving a lot of request just ignore and try again later, or account may be reviewed manually but it doesn't matter because it takes highest 1-6 hour.

Verify your Domain

At the time of sign in they will ask no username and password but the digital certificate they give you at the time of registration. Don’t worry as this was automatically saved in your browser and will give you access to your control panel. 


Click the validation wizard and scroll down the menu to “Domain name validation” and enter domain address. Remember they will offer you 5 email address and within which they can send the authorization code. The 3 email will be Postmaster@yourdomain.com, hostmaster@yourdomain.com and webmaster@yourdomain.com and the other 2 will be the email address from WHOIS registry and if you don’t have the email account I suggest you better create one of these. Copy the authorization code and paste in verification box and your domain is verified.


Create CSR in your cPanel

To get a SSL certificate you must create a certificate signing request from your cPanel to do so go to your cPanel and click in SSL/TLS manager.

 First create a private key by clicking “Generate, view, upload, or delete your private keys.” and better save it because without a private key ssl is useless. 

Then generate your CSR by clicking “Generate, view, or delete SSL certificate signing requests.” Use the same private key and fill up the csr form. Click on generate and you will have your CSR.

Upload CSR and Get SSL certificates

Now go to StartSSL control panel and click on certificate wizard and set certificate target to “Web Server SSL/TLS Certificate”. 

Proceeding you will see generate private keys field in next step and leave it blank write nothing and click “skip”. 

Next step is to upload CSR you already generated in cPanel. Copy the whole CSR and click next. 

Next step is for adding a sub domain; just add “www” in the blank field. 

You should get immediate SSL certificate, copy the whole certificate and proceed to next level. 

Note: Some time they mark the new certificate for additional review which requires extra 1-3 hours to verify your certificate. As soon as, they verify you will get a confirmation email from them and you can download it from tools box> retrieve your certificates menu in their control panel.

Save and Install SSL certificates

You must install the certificate in your cPanel to do so go to your cPanel and click in SSL/TLS manager and click on “Generate, view, upload, or delete SSL certificates.” Then paste the whole certificates in the box and save it. Now return to SSL/TLS manager and click on “Manage SSL sites.” Ok now select the certificate and select the corresponding domain and auto fill all the blanks then activate ssl in your website.


How to Renew SSL Certificate

To upgrade the free SSL certificate, repeat the same process just add a different subdomain instead of www( the yellow background text). Don’t worry the new certificate cover your root (ex  yourdomain.com) but doesn’t  cover  www.yourdomain.com so in that case you have to add the following code to your .htaccess file.

.htaccess Code 

RewriteEngine On 
RewriteCond %{SERVER_PORT} 80 
RewriteRule ^(.*)$ https://domain.com/$1 [R=301,L]
RewriteCond %{HTTP_HOST} ^www\.domain\.com  [NC]
RewriteRule ^(.*) http://domain.com/$1 [L,R=301]
This will set all the traffic to https://yourdomain.com 

Cloudflare Free SSL Certificates

Cloudflare has recently introduced free universal SSL to provide SSL to all users worldwide and this will work if you don’t have any SSL manager too. 
Cloudflare Flexible SSL: 
This will encrypt the connection between website visitors and cloudflare network but not from cloudflare to your server. However the benefit is your visitors will see a green lock though your website don’t have a ssl.
Cloudflare Full SSL: 
This will encrypt the connection between website visitors and cloudflare network also from cloudflare to your server. You must have a valid or self-signed SSL in your server for this and visitors will see a green lock at their browser.
Cloudflare Strict Full SSL:
 This will encrypt the connection between website visitors and cloudflare network also from cloudflare to your server. You must have a valid SSL in your server for this and visitors will see a green lock at their browser.
Activation of Cloudflare SSL:
To activate the cloudflare SSL just sign up to cloudflare and choose free plan at the time of registration. Now go to setting and choose whichever SSL you want to and SSL will be activated automatically within 24-48 hours.

Cloudflare vs StartSSL 

Using Cloudflare, even with free SSL, is not an increase to the security and privacy of your users. Also Cloudflare records each and every information about your users and, by default, blocks users who attempt to view your site through privacy-enhancing software. I would suggest that people looking to install SSL on their website (this should be everybody) instead get their free SSL certificate from StartSSL who do not spy on or block your users. But you cannot activate StartSSL if you doesn’t have a paid hosting so at this case the choice goes to Cloudflare SSL.

Read More

Saturday 6 December 2014

Free Web Hosting Sites In India

8 comments :
In this Information age, having a website is very important to publish your identity online. Websites are a very popular way to earn online via blogging etc. A website contains most two important part domain names and hosting. Domains are the head of the websites where as hosting is the heart of the website. All the information including files, scripts, databases etc. are stored in the hosting platform. Can you imagine yourself without heart, No right?

Why choose free hosting

Free hosting is the easiest way to publish your website online within minutes even without any domain names. Now-a-days, most of the free hosting sites provide free sub domains. This is the hassle free, tension free, contract free path to build a nice website. All the earnings coming from these websites are directly goes to your pocket. Cool na?

How does free hosting work

Free hosting works in 4 simple steps Signup, login, create account and upload your website. Registration is really simple. Fill up the required information with correct email id and put the correct captcha code. Open email inbox and confirm the registration. Log in with correct username and password that you provided at the time of registration. Create your website name and upload your contents in cPanel And its done.

  • Top 5 Hosting Sites In India

  • The top 4 young Hosting site provider in India are Ultimatefreehost.comUltimatefreehost.inGoogiehost India andX20hosting Network.These websites using either Youhosting's  or MOFH's Api to provide free hosting. These all sites are really beautiful, simple, user friendly and perfect for your website hosting.

  • Ultimatefreehost Network

  • Ultimatefreehost was established in early 2013 in order to provide free hosting in India basically for the students to host their projects etc.  Since then, it is continuously working and providing free hosting to thousands of people throughout all over the world. In addition to these, ultimatefreehost also provides free seo tools and full website review service for their customers.

 Ultimatefreehost.com provides 20 GB disk space, 200GB Bandwidth and unlimited website hosting features for their clients. 

  1. No Ads or banners to your website.
  2. Php 5.4 and Mysql 5 Support
  3. Unlimited Email and Ftp accounts.
  4. Free sub domain from 1ufh.com and uf9.in
  5. Responsive CPanel
  6. Instant Setup and No hidden Charges.

Ultimatefreehost.com Cpanel:


  •  Ultimatefreehost.in provides unlimited disk space, unlimited Bandwidth and unlimited website hosting features for their clients. 

  • Unlimited Resources without Ads
  • Free SSL certificates
  • Free sub domain from ultimatefreehost.in
  • cPanel X3 Control Panel ( not real cPanel 11)
  • Softaculocus autoinstaller.

Ultimatefreehost.in Cpanel:


  • Googiehost India


    • Googie India founded on 25th March 2011 but they came online with a new brand name "GoogieHost India" in November 2012. Googiehost have more than 10000 satisfied customers throughout the world. Googiehost provides unlimited disk space, unlimited Bandwidth and unlimited website hosting features for their clients. 

          • Unlimited Resources without Ads
          • Spam Protection
          • Free sub domain from 1gh.in
          • And lots of other cool features.
        • Googiehost Cpanel:


          • Merahost Network

          • X20hosting is basically a part of Merahost network which is famous in India for premium hosting. However they also offer free hosting with lots of awesome features. 
  1. 20 Gb disk space and 200 gb bandwidth for each customers.
  2. SSH Access
  3. Free sub domain from x20.in
  4. Php and Mysql support.
  5. Better customer support.

Limitation of Free Hosting

Free hosting are great for testing and learning purpose but really not recommended for advance level.Free resellers from Youhosting have frequently "Maximum CPU Limit Exceed" problem which occurs from a little more website traffic, whereas free resellers from MOFH have the "Daily innode limit" problem which indicates a limited number of visitor is permitted in your website. So if you are facing these kind of problem in free hosting, i recommended you to upgrade your hosting plan.


                  Read More

                  Friday 5 December 2014

                  Get A State Bank (SBI) Free Virtual Credit Card (VCC) Online

                  2 comments :

                  • What is SBI Virtual Credit Card

                    • I Have already told How to make a International Free Vcc and Verify Paypal before, Now i am going to tell you about SBI VCC.State bank of India (SBI) recently introduces one time virtual credit cards for making online payments in India, Nepal and Bhutan. This Virtual card, Visa or Master Card, provides an easy and secure way of transacting online without providing the Primary Card/Account information to the merchant. No separate  registration is required, this card can be generated through online mode from SBI Official site.

                    Features of SBI VCC

                  • It reduces the risk of exposing the underlying Credit/Debit limit as the Primary Card / Account details are not communicated to the Merchant.
                  • Card can be used at any online merchant site that accepts Debit/Credit Cards.
                  • Unlimited Cards Can be generated by one customer.
                  • There are no fees for generating Virtual cards.
                  • Can be generated Online within a seconds.

                  How Can I Create SBI VCC


                  • Login to your online banking account (www.onlinesbi.com) and click on “Requests” tab and select “State Bank Virtual Card” option.

                  • Click on “Generate Virtual Card” tab.
                  • Enter the amount and select an account which will be debited for funding (initially lien-marking and later debiting) the Virtual Card.
                  • Enter the secure 8-digit password (OTP), received on your mobile and Confirm the details.

                  • Follow the Procedure and you will have your own Virtual Credit Card.

                  Facts About SBI VCC

                  • Minimum and Maximum amount of issue is respectively Rs. 100 and Rs. 50000.
                  • Currency of issue must be in Indian Rupees (INR.)
                  • Validity of the card will be ended after transaction or after 48 hours of issue of generating cards.
                  • A One Time Password (OTP) is required For generating this card.
                  • Not For International Use, such as Paypal etc.
                  Read More

                  .COM Domain at $1.49 or Rs. 99 From Godaddy

                  No comments :


                  Hello guys, I hope you already read How To Buy Domain Name At Minimum RateFrom Godaddy Without any Coupon Codein my previous blog. Now Find out The latest working secret promo code of Godaddy, using which you can register a .COM domain name at only $1.49 (Rs.99). This Promo code will work for only new domain registration, and cannot be used at domain renewal.

                  How to apply This Promo code at Godaddy Full Picture Tutorial

                  1) Go to godaddy.com and search for your favorite domain name.


                  2)Select domain and continue to cart. Don’t worry about price at this stage.

                  3)Continue this stage again

                  4)Now set term of registration to 1 year, and apply promo code “cjcrmn149s” and you will see the magic.

                  5)Note: This offer only valid for new domains registration and can be paid by Debit/Credit Card.

                  Enjoy Your New Domain. 

                  More Godaddy Coupon of December 2014

                  In addition to this, I would like to share more Godaddy working promo code to save your money.

                  Benifit
                  Coupon Code
                  84% Off .COM Domains + $1 Private Registration, Only $4.00
                  cjcrmn3cp
                  .Com or .Net Transfer at $5.99
                  cjc599new
                  1 Year Economy Hosting + Free Domain at only $12
                  cjcrmn1hos

                  Thanks For reading my blog. Have a good day.

                  Read More

                  How To Buy Domain Name At Minimum Rate From Godaddy Without any Coupon Code

                  2 comments :


                  Godaddy Domain Registration


                  Godaddy is a multinational, award winning company which sells Domains, Hosting, VPS, Dedicated servers, SSL Certificates etc. to millions of customers around the world. Normally a .COM domain costs you $14.99 (RS. 928) from Godaddy and a .IN domain cost you approx. $8.99 (RS. 556), and everybody loves to get this domains at cheaper rate, so they search promo code or coupon code of Godaddy from the internet. But today, I am going to share how to get a .Com name at $1.49 (RS. 99) and a .IN domain at only $2.29 (RS. 125), obviously without any promo code.

                  How To Buy Domains  At Cheapest Rate

                  I hope you already read .COM Domain at $1.49 working promo , well then first of all you have to turn off any ad blocking software because Google Ads is important here.

                  Go to google.com, and search the keyword “Godaddy Domain Buy”.  Results will be like this, just click on “Rs. 99 .com”
                  Note: The search result will vary with country; You have to choose appropriate option.
                  RS. 99 = $1.59 (approx.)

                  Register .Com Domain from Godaddy only at $1.49

                  The page will forwarded to Godaddy.com and the following Results will appear.
                  You can check Godaddy’s  terms. and conditions here
                  Then follow the instruction and buy .com domain at cheapest rate.

                  Register .IN Domain from Godaddy only at $1.49

                  Go to google.com, and search the keyword “Godaddy Domain Buy”.  Results will be like this, just click on “Rs. 125 .IN Domains name”
                  Note: If you are unable to see just reload the page some time . 
                  The page will forwarded to Godaddy.com and the following Results will appear
                  Then follow the instruction and buy .IN domain at cheapest rate.


                  Conclusion


                  The offer is not limited in India. If you are from another country, searching from cheap domain registration from godaddy, then follow the process and buy your own country TLD at minimum prce. Just let me know in comments if it works. Have a Good Day.
                  Read More

                  Tuesday 7 October 2014

                  How To Speed Up IDM 10 Times Faster Full Picture Tutorial

                  1 comment :

                  download (1)

                  Internet Download Manager (IDM) is a tool to increase download speeds by up to 5 times, resume and schedule downloads. Comprehensive error recovery and resume capability will restart broken or interrupted downloads due to lost connections, network problems, computer shutdowns, or unexpected power outages. Simple graphic user interface makes IDM user friendly and easy to use. Internet Download Manager has a smart download logic accelerator that features intelligent dynamic file segmentation and safe multipart downloading technology to accelerate your download. Unlike other download managers and accelerators Internet Download Manager segments downloaded files dynamically during download process and reuses available connections without additional connect and login stages to achieve best acceleration performance.

                  In today's tutorial, i am going to show you how to increase the downloading speed of Internet download manager. Yes, it's possible. Just follow few simple steps & you will see the changes. Let’s start.....

                  Step 1:

                  At first, open internet download manager and click option.

                  clip_image002

                  Step 2:

                  Now, a new tab will appear. Find the "connection" in there & click on it.

                  clip_image003

                  Step 3:

                  Now, set "Connection Type/Speed"= High speed: Direct connection (Ethernet/Cable)/Wi-Fi/Mobile 4G/other.

                  clip_image004

                  Step 4:

                  Set "Default max. conn. number"= 32 & click on ok.

                  clip_image005

                  Now, the downloading speed will be at least 5 times faster. You can do a little more with it. You have to download IDM optimizer which will increase the speed more. Just follow the step's bellow....

                  Step 5:

                  So first download "IDM Optimizer" from this link.

                  http://hotfile.mobi/dqs7zw2

                  clip_image006

                  Step 6:

                  It's a RAR file so after download extract it with WinRAR.

                  Step 7 :

                  Now exit IDM from window Taskbar by right clicking on IDM and select exit then open "idmoptimizer.exe".

                  clip_image007

                  Step 8 :

                  Then click on "Maximize Now".

                  clip_image008

                  Done.. Now you have to restart your pc to apply changes. Now downloading speed will be increased. It works for me; I hope it will work for you to.

                  If you have any question, please comment

                  Read More